Sunday, June 5, 2016

Some Watercolor Painting


It been a while since I've posted. Lately I have been doing some water color. 


Lily Pads, I did this one from a photo I took in Alaska


Motif #1


Sandspit State Park, Seward, Alaska, The white trees on the island sucked up salt water during the 1964 earthquake and are now preserved.


Sleeping Lady, Alaska


Sleeping Lady, Alaska


Sleeping Lady, Alaska


Long Point Lighthouse, Provincetown, MA


Provincetown, MA


Provincetown, MA


Sleeping Lady, Alaska


Denali National Park, Alaska


Denali National Park, Alaska


Kennebunkport, ME


Provincetown, MA


Provincetown, MA


Provincetown, MA


Lupin


I did some Sumi-e type painting using ink and watercolor


Portland Head Light, ME


I also took an oil painting class in Rockport, MA, using a palette knife to paint.


This is the first one I did from an image of a place in Canada


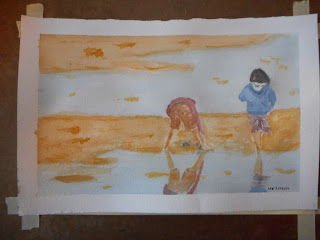
This is the second one I did on Front Beach in Rockport, MA

Monday, May 5, 2014

Tissue Box with Speakers

Tissue box cover with speakers, this was a design request by my sister in law, she wanted the tissue box cover with speakers. So this is what I came up with.


The basic design is just like the Tissue box, dovetail joinery and pencil holder in back. So I'm going to start with the speaker addition. The first thing for the speakers is cut the holes. I started by cutting a groove with a 3" hole saw, about half way into the wood.


Then I cut the center hole using a 2 3/4" hole saw to make the speaker hole.


That made a groove that the speaker grill will fit into.


I got Pyle Home, 100w speakers, I took them out of the shell, but used the grill. I used Gorilla glue super glue to attach the grill into the groove.


Then came attaching the speakers, I had pre-drilled the holes before I glued the box together. I used a stubby screw driver to screw the speakers in place. Then did the wiring, and attached the headphone jack.


The finished Product. The Shelf fits a Field Notes notebook perfectly.


Earth Girl's Love Display Log

I've been working on making a display for My sister-in-law and her friend's new company "Earth Girls Love". My sister-in-law wanted it to be a hollowed-out birch log.

Here is a page from my Field Notes with my sketch of how I thought it could be done.


I bored out most of the stuff with a 1 1/2" forstner bit. I had to use My handheld drill to do the boring because I don't have a drill press (which would have made this part a little easier) .


After the boring was done I used my chisels to clean up the sides and to square the ends. which you can see in this photo.


In this photo you can see it finish and on display with the Lip balm in it. In case you're wondering, the flavors featured below are peppermint and Sweet Orange Vanilla. You can find this natural lip balm in many locations around Anchorage. You can also check out my handi-work in person, while you're perusing the lip balm!


Saturday, August 10, 2013

A Pair of Mallets

I have wanted to make myself a mallet for a awhile now, so that is the next project I'm going to share here. I decided to do a small one and a larger one. Below is the drawing I made before I started.


To begin, I glued up 3 pieces of leftover walnut from last project and put it in the lath.


Then I turned it till I had a cylinder. 


My wood was long enough to make both mallets out of the same piece. In order to maximize the use of the wood and to prevent mistakes, I laid out some guidelines to help make the shapes. I worked on the larger mallet first then moved over and did the smaller one. 


I finished it with a beeswax based finish.


I got a leather strap for the smaller mallet and will hang it above my mini-workbench once I've set that up. Stay tuned, I plan to post pictures of my small at-home work area once it's set up. 

Monday, July 22, 2013

Tissue Box

So  my next project was to make a tissue box cover that could hold pencils and have a little shelf. Here is the design.


I decided to do the box in walnut. Walnut is one of my favorite woods. I started by doing the box, I did all the dovetails by hand.


My dovetails were so small I had to order two new Two Cherries chisels a 2mm and 4mm.

Then I moved on to the top I drilled all the holes and the slot for the tissues to come out of. I used a drill press for the holes and I used a mortising machine for the slot. Then I hand did the dovetails.


The finish is a bees wax based finish. Which darkens up the color of the walnut.